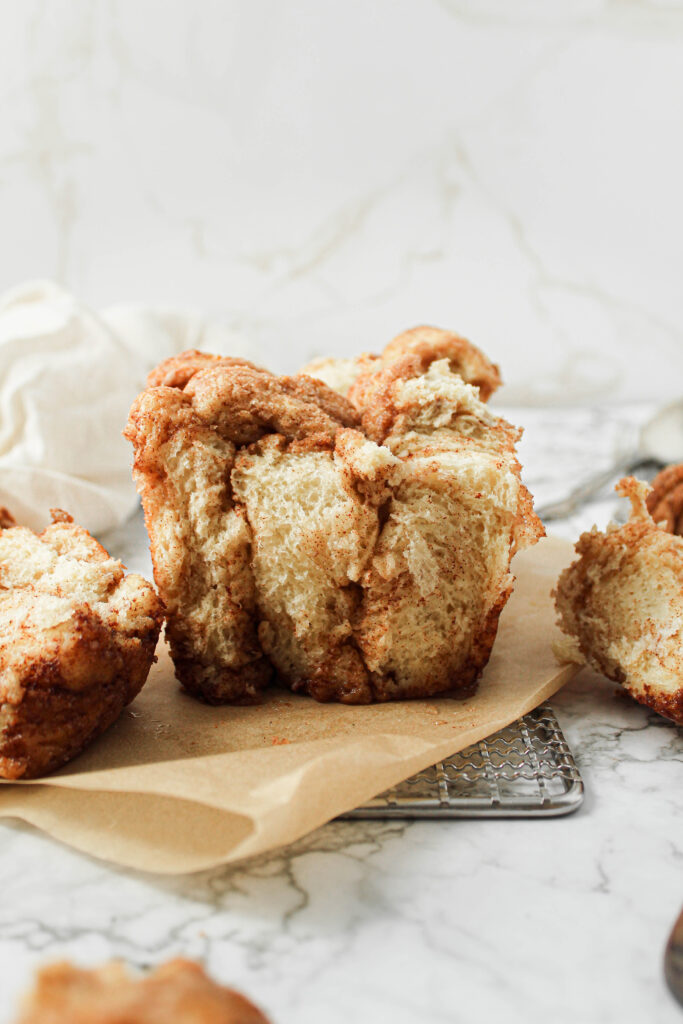
Pull Apart Cinnamon Roll Bread
Okay okay okay. I know I say this a lot. But this pull apart cinnamon roll bread is what gets me up in the morning. It is SO soft and fluffy, the outside gets a little crisp while the bottom is OOEY and GOOEY and smothered in a buttery cinnamon sugar mixture. And I get it – yeast is scary. But it should not be. Yeast is honestly so magical and if you have flour and a counter where you can knead your dough, you can make yeast breads your b*tch.
This recipe reminds me so much of monkey bread, which I used to eat a lot as a kid (like borderline too much but we’re not going to harp on that). Now, why is it even called monkey bread? My wikipedia knowledge tells me that it is because it is a finger food – we pick apart the bread as a monkey would. Traditionally, monkey bread is in a bundt pan and rolled in a cinnamon sugar mixture. But I have a few tricks up my sleeve that makes it EVEN better which is why I call it EXPLODING pull apart cinnamon roll bread. Like, literally it will explode in your oven. You will need to put a roasting pan underneath your loaf pan because odds are some of the rolls will fall out and the buttery cinnamon sugar GOODNESS will spill out of the pan.
Okay now let’s talk deats.
What ingredients do I need for this cinnamon roll bread?
For the dough you will need:
- 1 standard instant yeast packet (about 2 1/4 teaspoons)
- Milk, warmed to about 110 degrees Fahrenheit
- Granulated sugar
- Unsalted butter, melted and slightly cooled
- Eggs
- All purpose flour
- Bread flour
- Salt
For the coating you will need:
- Unsalted butter, melted
- Granulated sugar
- Ground cinnamon
Why do I need bread flour?
So, I used bread flour when developing this recipe because of its protein content. To get all science-y for a second (I hated science in school so who thought it would excite me now?), the main difference between bread flour and all purpose flour is the protein content. Bread flour has a high protein content and therefore can produce lots and lots of gluten. This gives the bread its classic elasticity and stretch. HOWEVER we do not want to use ALL bread flour because then it will be too chewy. Compare it to a pizza, which typically uses bread flour. Pizza is very chewy – which we don’t want – we want the bread to be light and fluffy and tender. My mouth is watering just thinking about it.
To be completely transparent, I used bread flour when I was testing this recipe for the first time because I ran out of all purpose flour (LOL) but I loved it so much I decided not to change it. I think it is the key to a soft, light, fluffy, and tender cinnamon roll bread.
How long does the cinnamon roll bread dough need to rise?
To make a long story short, yeast is truly amazing. If I put back on my science hat for a second, the scientific name for yeast is Saccharomyces Cerevisiae, which literally means “sugar eating fungus.” Yeast feeds on the sugars in flour and produces carbon dioxide in the process, which gives bread that beautiful rise.
This bread requires two rises. The first is for two hours. I know it’s annoying, but worth it. It always gives me so much satisfaction to start off with a small dough ball and then it grows into a massive monster that’s going to eat my children. Just kidding, I don’t have any children. And then it is even MORE satisfying to punch it down when it’s ready to get all the air out of it.
Yeast thrives in a warm, draft-free environment, so definitely put a towel over your bowl. I also like to put my bowl in the oven (while it’s OFF) with the door cracked open. That will give it the perfect place to be happy and grow. Once the first rise is done, we will roll it in the coating mixture, place the dough in the loaf pan, cover it and let rise again for another 20 minutes. You will see in this quick 20 minutes HOW much this dough can rise. Which again, is why you need a pan underneath your loaf pan in the oven because it will, indeed, explode.
Why does this recipe also include measurements in grams/milliliters?
Measuring ingredients by weight is actually the most accurate way to bake. I would bet $10 right now that if you were to measure one cup of flour, twice, they would not weigh the same both times. Moral of the story: not all cups are created equal, and because baking is a science, measuring ingredients by weight allows for accuracy in all of the ingredients proportions.
I hope you love love love this pull apart cinnamon roll recipe as much as me! Drop a comment if you give it a try!
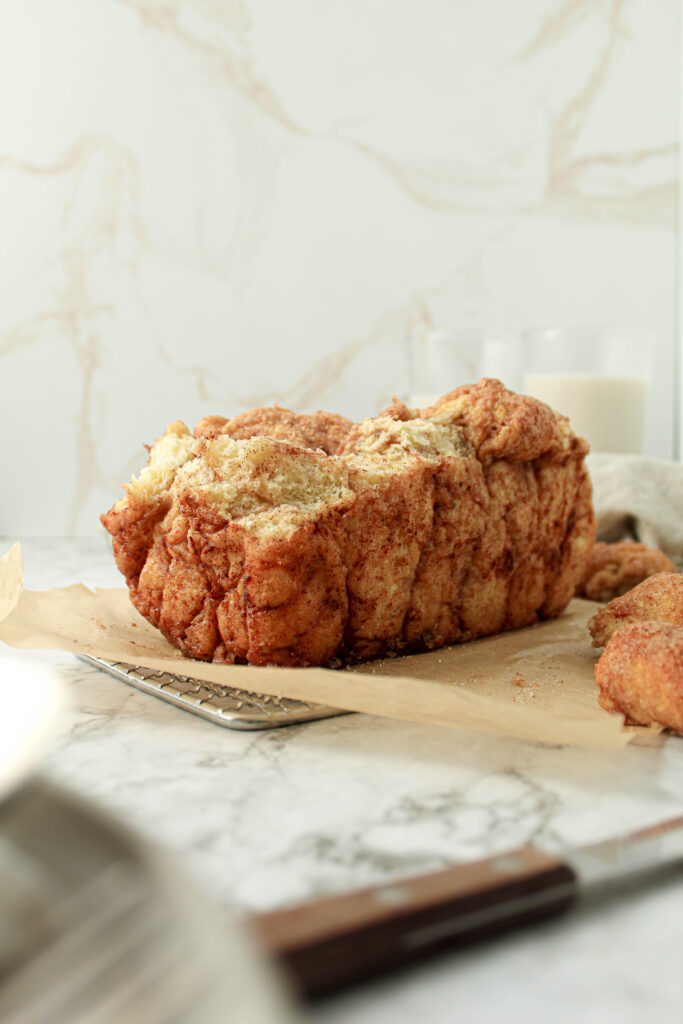
Exploding Pull Apart Cinnamon Roll Bread
Ingredients
Dough
- 1 standard instant yeast package
- 1 1/4 cup (295 mL) milk, warmed to about 110 degrees Fahrenheit
- 3 tbsp (40 grams) granulated sugar
- 1/4 cup (57.5 grams) unsalted butter, melted & slightly cooled
- 2 eggs, room temperature
- 3 1/4 cup (400 grams) all purpose flour, plus more for kneading the dough
- 3/4 cup (100 grams) bread flour
- 3/4 tsp salt
Coating
- 1/2 cup (115 grams) unsalted butter, melted
- 1 cup (200 grams) granulated sugar
- 1 tbsp ground cinnamon
Instructions
- In a bowl, whisk together the warmed milk, yeast and granulated sugar. Cover with a towel and let it sit for 5 minutes until foamy. Meanwhile, in a separate bowl, whisk both flours together.
- Once the yeast mixture is foamy, add the melted & cooled butter, salt, eggs and one cup of the flour mixture and beat for 30 seconds on low speed. Scrape down the sides of the bowl, add the remaining flour, and beat for about 2 minutes. Once the dough starts to pull away from the edges of the bowl, it is ready to knead. It WILL be sticky, but don't worry, you will knead more flour into the dough.
- With floured hands, remove the dough from the bowl and place on a lightly floured surface. Sprinkle more flour on top of the dough and knead with your hands for about 2-4 minutes. The dough is ready when you poke it with your finger and it bounces back.
- Lightly coat a bowl with oil, place the dough inside the bowl and turn it so the dough is also coated with oil. Place a towel or saran wrap over the bowl, and put it in a warm and draft-free environment for it to rise for approximately two hours, or until it doubles inside.
- When the dough only has about 10 minutes left to rise, line a 9×5 inch loaf pan with parchment paper, and make the coating. In a microwave safe bowl or on the stovetop, melt the butter. Once melted, mix it with the granulated sugar and ground cinnamon. Punch the dough down to remove the air. With your hands, make small dough balls and roll it in between your palms. Be modest with the size of the dough balls as we want about 36-40 balls total. Roll each ball in the butter/cinnamon/sugar mixture and place in the loaf pan, packing them in the pan. Once complete, cover the loaf pan and let rise for another 20 minutes. It will begin to puff up out of the pan.
- While waiting, preheat the oven to 350 degrees. After the 20 minutes is over, remove the saran wrap and place the loaf pan on a roasting pan. This will protect the bottom of your oven from any butter/sugar that spills out. Bake for 35-40 minutes until the top is golden brown. If you notice that the tops are browning too quickly, place a piece of foil over the top of the pan.
- Once done, let cool for 5 minutes and serve warm while it is ooey and gooey and delicious. Store in an airtight container in the fridge for 4-5 days. Enjoy!!!