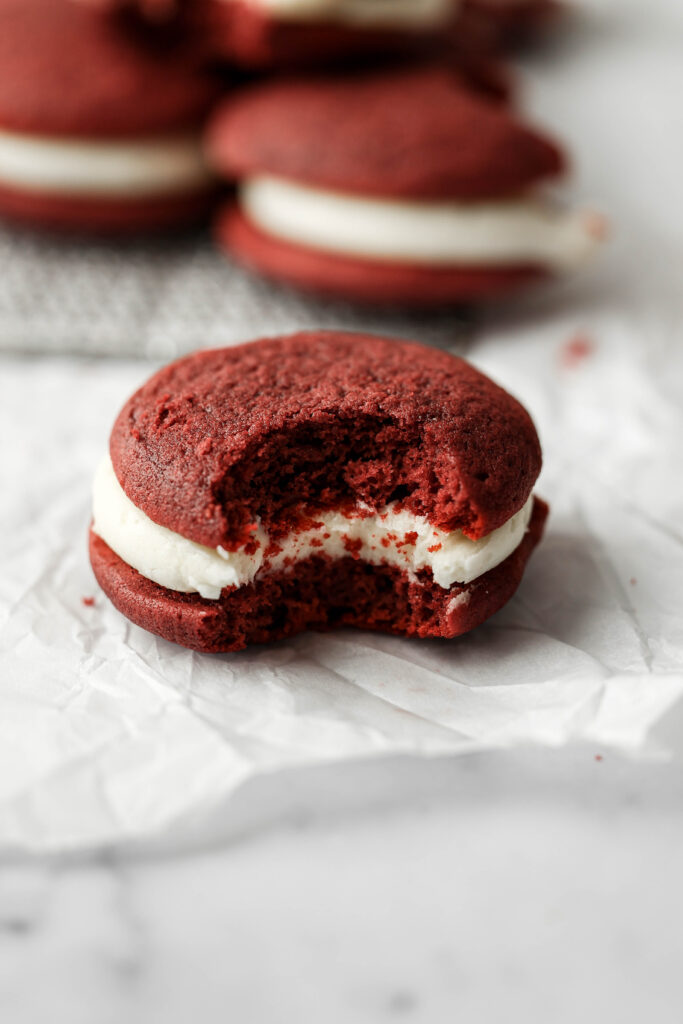
These red velvet whoopie pies are out of this world - it's a cake/cookie mashup sandwich that is filled with a delectable cream cheese frosting. They look fancy but they are incredibly easy to make and are always a crowd pleaser.

Why you will love these red velvet whoopie pies
- The flavors. Red velvet is such a classic and delicious flavor - it has a subtle cocoa flavor but with a tang. Two cookies are smushed together using a cream cheese frosting, and is there anything better than a cream cheese frosting?
- The textures. The texture of the red velvet cake is super soft and moist. Even though they look like cookies, they are cake-like in texture. The cream cheese frosting is super smooth and creamy. A red velvet whoopie pie is basically a cake but in cookie form. It's delicious.
- It is so easy to make. These whoopie pies look complicated and fancy but they are actually so easy to make! The red velvet cake bakes in 10 minutes, and the frosting is so easy to whip up.

Key ingredients
- All purpose flour: all purpose flour is the flour of choice for these whoopie pies. It makes for the perfect soft and tender crumb.
- Unsweetened cocoa powder: cocoa powder is an important ingredient in red velvet cake in both the taste and the appearance. It adds a slight cocoa flavor and it also aids in the color. Cocoa power has anthocyanin which is PH sensitive, so it reacts when mixed with buttermilk and vinegar. This makes the cocoa turn a dark, almost red color.
- Leavener: we use baking soda to help the cake spread and baking powder to help the cake puff up.
- Unsalted butter: unsalted butter is the butter of choice so we can control exactly how much salt goes into the recipe. We also use butter in the cream cheese frosting.
- Sugar: granulated sugar is the sweetener for the cake, while powdered sugar is the sweetener in the frosting.
- Fats: the fats in this recipe are the butter, eggs and the whole milk - they make these whoopie pies super moist and soft.
- Vinegar: in this recipe, we mix vinegar with whole milk to create buttermilk. Please do not sub the whole milk for store bought buttermilk! The vinegar in this recipe was measured specifically for pairing with whole milk. If you use buttermilk and vinegar, it will be way too acidic and will affect the cookies ability to rise.
- Red food coloring: to help deepen the red hue of the cake, we use a bit of red food coloring.
- Cream cheese: for the cream cheese frosting, of course! I like to use full-fat cream cheese for an extra smooth frosting.

Steps
- Mix the milk and vinegar. Add a tablespoon of vinegar to the whole milk and let it sit for 5 minutes. The milk will slightly curdle a bit - this is okay.
- Whisk dry ingredients. Add the flour, cocoa powder, baking soda, baking powder, and salt to a bowl and whisk to combine.
- Beat wet ingredients. Beat together the butter and sugar. Add the eggs one at a time then beat. Add the vanilla extract and red food coloring and beat.
- Combine. Add half of the dry ingredients and mix until almost combined. Add half of the milk/vinegar mixture and mix until almost combined. Repeat with the other halves of the dry ingredients and the milk.
- Bake. Scoop the batter using a small cookie scoop (about 1 oz) and place them on a baking sheet 3-4 inches apart. Bake for 10-12 minutes.
- Make the cream cheese frosting. Beat the cream cheese and butter together until combined. Add the vanilla, powdered sugar, and milk and beat until combined.
- Frost. Frost the underside of one cookie with the cream cheese frosting, and sandwich it with another cookie. Repeat with all of the cookies. Enjoy!

Red velvet whoopie pie baking tips
Properly measure the flour.
Too much flour and the cookies will be way too dry and not spread. The best way to measure flour is with a kitchen scale - it is the most accurate. If you don't have a kitchen scale, spoon the flour into a measuring cup, then level it off with a knife.
Don't over bake.
You want to pull the cookies from the oven when the edges are just set. Things continue to bake when you take them out of the oven - so even if they look slightly underdone in the center, they will be fully cooked by the time you are ready to dig in.

Use room temperature ingredients for the frosting.
Make sure to use room temperature cream cheese and butter for the cream cheese frosting. This will make it easier to have a smooth and creamy icing. If the ingredients are too cold, the frosting will likely have lumps.
Wait to frost the cookies until they are completely cool.
If you frost the cookies when they are even slightly warm, the frosting will melt and the sandwiches won't stay together.
How do I store this?
Store in an airtight container in the fridge.

Baking in grams
While I provide volume measurements for the recipes on my blog, I highly suggest baking these recipes using weight. It is the most standardized and accurate way to bake. I carefully recipe test all of my recipes using a kitchen scale, not by using cups, and therefore I cannot guarantee the success of my recipes when using volume measurements.
Other recipes you may like

Red Velvet Whoopie Pies
Ingredients
Red Velvet Cake Cookies
- 250 grams (2 cups) all purpose flour
- 15 grams (3 tablespoons) unsweetened cocoa powder regular, not dutch processed
- ½ teaspoon baking soda
- ½ teaspoon baking powder
- ½ teaspoon salt
- 113 grams (½ cup) unsalted butter room temperature
- 200 grams (1 cup) granulated sugar
- 2 eggs room temperature
- ½ tablespoon vanilla extract
- 2 teaspoons red food coloring
- 120 mL (½ cup) whole milk room temperature, see note
- 1 tablespoon white vinegar see note
Cream Cheese Frosting
- 8 oz cream cheese room temperature
- 226 grams (1 cup) unsalted butter room temperature
- 2 teaspoons vanilla extract
- 840 grams (7 cups) powdered sugar
- 1-2 tablespoons whole milk or heavy cream
Instructions
Red Velvet Cake Cookies
- Preheat oven to 350 degrees Fahrenheit and line a baking sheet with parchment paper. Set aside.
- In a small bowl, combine the whole milk and vinegar. Set aside. See note.
- In a medium-sized bowl, whisk together the flour, cocoa powder, baking soda, baking powder, and salt. Set aside.
- In a medium-sized bowl or the bowl of a stand mixer fitted with the paddle attachment, beat the butter and sugar together on medium-high speed until light and fluffy. About 2-3 minutes.
- Add the eggs, one at a time, mixing well on low speed in between each addition, scraping down the sides and bottom of the bowl if necessary.
- Add the vanilla extract and red food coloring and mix on low-medium speed until combined.
- With the mixer on low, add half of the dry ingredients. Once almost fully incorporated, add half of the milk/vinegar mixture and mix until almost combined. Repeat this with the other halves of the dry ingredients and the milk/vinegar mixture. Do not over mix.
- Using a small cookie scoop (mine is a 1 oz cookie scoop), spoon the batter onto your baking sheet and space each spoonful 3-4 inches apart as they will spread.
- Bake the cookies for 10-12 minutes until the edges are set. Allow them to cool completely.
Cream Cheese Frosting
- While the cookies are cooling, make the cream cheese frosting. In a medium-sized bowl or the bowl of a stand mixer fitted with the paddle attachment, beat the cream cheese and butter together on medium speed until combined, smooth and no more lumps exist. About 4-5 minutes.
- Add the vanilla extract, powdered sugar, and milk and mix on low speed at first for 30 seconds (so the powdered sugar doesn't go everywhere) then mix on medium-high speed for 1-2 minutes until the frosting is smooth and combined.
- Once the cookies have cooled completely, frost the underside of one cookie with the cream cheese frosting, and sandwich it with another cookie. Repeat with all of the cookies. Enjoy!
- Store in an airtight container in the fridge.
Notes
- Important note: even though mixing whole milk and vinegar creates buttermilk, do NOT use store bought buttermilk. Yes, buttermilk is acidic, but the vinegar in this recipe was measured specifically for pairing with whole milk. If you use buttermilk and vinegar, it will be way too acidic and will affect the cookies ability to rise. So I suggest following the recipe instructions.
Tried this recipe? Make sure to rate and review and tag @sturbridgebakery on Instagram!


Ann
Hello, Jess! Beautiful recipe, I would love to try it ?
And I have a question: can I sub white vinegar with apple cider vinegar?
Jess Italiano
Hi Ann - I haven't tried it, but I imagine it could work as it will still provide a similar amount of acidity. Let me know how it comes out if you give it a try 🙂
Ann
Thank you so so much for your reply ?
I will let you know ?
Jaclyn Boyd
So I sifted through 6 different red velvet whoopie pies to find one that contained similar ingredients to real red velvet and this was the only one. These are fast easy and fool proof if you follow directions. So soft, fluffy and flavorful they are perfection. If I could do one thing I think I'd try adding oil or something to make them a little more moist. There by no means dry so very soft just could be a tad more moist on the inside. I improvised and used an oreo cream cheese buttercream filling on half and a marshmallow cream cheese frosting on the other half. Both were good but lacking that tang of cream cheese I wanted. They weren't from this author. I'd absolutely make these whoopie pies again. Im so happy this recipe worked my first time making whoopie pies it made my whole week that I didn't fail at these all thanks to a perfect recipe. Thank you for this! I hope you make more whoopie pie recipes! Like a chocolate cherry one or really anything ?
Jess Italiano
I am so happy they worked well for you!! Thank you so much for trying them! I will definitely be making more whoopie pies in the future 🙂