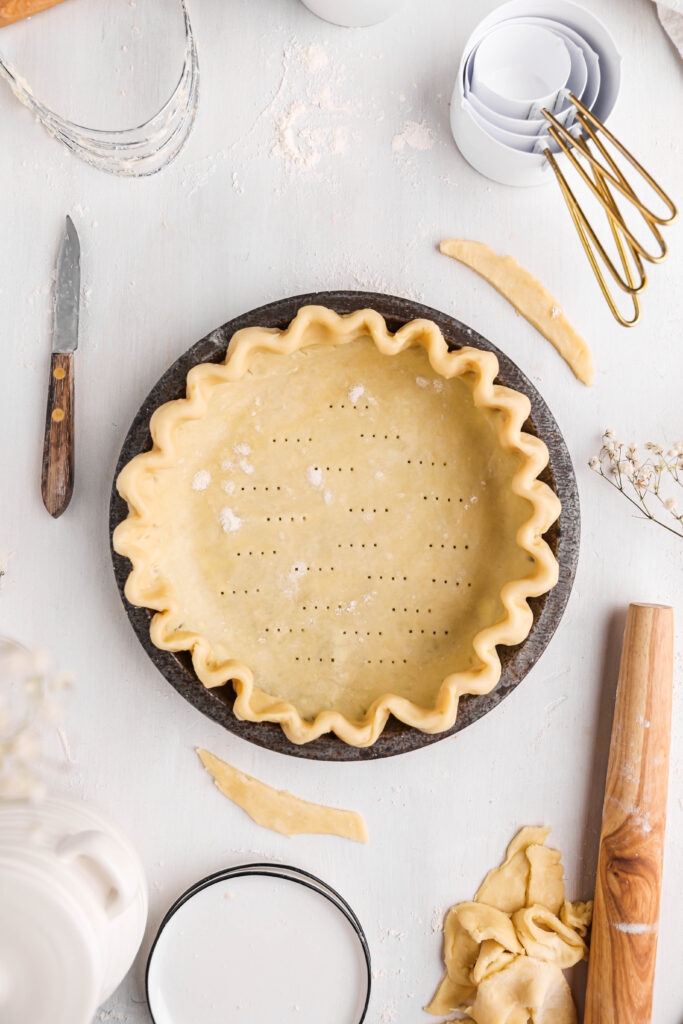
The Best Pie Crust Recipe
This pie crust recipe is surprisingly easy to make, has the best flavor, and is incredibly flaky & tender. From warm & cozy Thanksgiving pies, fruity summer pies, and everything in between, this recipe will be your go-to for all your future pie needs!
I know what you’re thinking. Why go through the effort of making a homemade pie crust recipe if I can buy it from the store? Many reasons.
Homemade pie crusts are often considered better than store-bought because they typically have a flakier texture, richer flavor, and they allow for more control over the ingredients, letting you choose high quality butter & flour for a superior taste.
Not to mention, pie dough can also be made in a food processor, if you have one. Making this straightforward pie crust recipe even easier!
Ingredient notes

Key ingredients
See the recipe card at the end of this post for the full ingredient list.
- Unsalted butter (preferably European-style!) gives a rich, buttery flavor to the pie dough, while maintaining a light crust with defined flakiness! You want to see pockets of butter in the dough as you are rolling it out, as those are what creates the characteristic flaky layers.
- Vegetable shortening allows the dough to stay pliable while rolling it out and shaping it, which is important if we want a beautifully decorated pie. Additionally, vegetable shortening has a high melting point, so it tenderizes the dough while allowing it to keep its shape.
- Ice water helps bring the dough together and keeps it cold, hopefully preventing the butter & shortening from melting.
Step by step instructions
See the recipe card at the end of this post for the full recipe instructions.
STEP 1: Whisk together the dry ingredients. In a large bowl, add the flour, sugar, and salt, and whisk until combined.
STEP 2: Add the butter & shortening. Cut the cold butter & shortening into your dry ingredients. Use a pastry cutter or your hands to break up the butter into pea-sized pieces and mix until incorporated into the dry ingredients.


STEP 3: Slowly incorporate the ice water. Start by adding 2-3 tablespoons of ice water to the dough. Use a pastry cutter or your hands to gently mix the dough. Continue to add water tablespoon by tablespoon until larger pieces form and the dough binds just enough. You may not need to use all of the water.

STEP 4: Form the dough. Pour the pie dough pieces onto a clean dish towel. Use the towel to tightly form the dough into a ball. This will bring the dough together without overworking it.


STEP 5: Chill the dough. Divide the dough into two equal pieces. Flatten them into discs, tightly wrap in plastic wrap, then place in the fridge to chill for at least two hours. At this point, the dough can also be frozen.


Using a food processor
Pie dough can also be made in a food processor with similar, simple steps. Pulse together the flour, sugar, and salt until combined. Add the cold butter & shortening and pulse until evenly incorporated and the butter is in pea-sized pieces. Add 2-3 tablespoons of ice water to the food processor and pulse until combined. Continue to add one tablespoon of water at a time until the dough just comes together in the food processor. Proceed the same way.
Recipe FAQ
A pie dough may not be flaky for two main reasons. One: the fat has melted before baking thus not creating pockets of steam necessary to form flaky layers. Two: the dough has been overworked & too much gluten has developed, leading to tough & chewy dough.
Yes! Once you have tightly wrapped the dough in plastic wrap, place the discs in a ziplock bag & freeze for up to 2 months. Let the dough thaw in the fridge overnight before using.
This depends on the type of pie you are making. Recipes that have a no-bake filling often require fully blind-baking the crust. Other recipes may require partially baking the crust before adding a filling and baking to completion. The recipe you are using should include instructions needed for blind or par-baking!
Have you tried this recipe?
I would love to know how it turned out! Leave a star rating & review below and tag @sturbridgebakery on Instagram so I can see photos & videos of your yummy bakes!
Want to save this recipe for later? Tap the heart button on the right side of your screen!

Best Pie Crust Recipe
Ingredients
- 313 grams (2 ½ cups) all purpose flour
- 1 tablespoon granulated sugar
- 1 teaspoon fine sea salt
- 170 grams (¾ cup) unsalted butter, cold & cubed
- 50 grams (¼ cup) vegetable shortening, cold
- 120 grams (½ cup) ice water
Instructions
- If making the dough in a food processor: pulse together the flour, sugar, and salt until combined. Add the cold butter & shortening and pulse until evenly incorporated and the butter is in pea-sized pieces. Add 2-3 tablespoons of ice water to the food processor and pulse until combined. Continue to add one tablespoon of water at a time until the dough just comes together in the food processor. Proceed the same way!
- In a large bowl, add the flour, sugar, and salt, and whisk until combined.313 grams all purpose flour, 1 tablespoon granulated sugar, 1 teaspoon fine sea salt
- Cut the cold butter & shortening into your dry ingredients. Use a pastry cutter or your hands to break up the butter into pea-sized pieces and mix until incorporated into the dry ingredients.170 grams unsalted butter, 50 grams vegetable shortening
- Start by adding 2-3 tablespoons of ice water to the dough. Use a pastry cutter or your hands to gently mix the dough. Continue to add water tablespoon by tablespoon until larger pieces form and the dough binds just enough. You may not need to use all of the water.120 grams ice water
- Pour the pie dough pieces onto a clean dish towel. Use the towel to tightly form the dough into a ball. This will bring the dough together without overworking it. See pictures in post for reference.
- Divide the dough into two equal pieces. Flatten them into discs, tightly wrap in plastic wrap, then place in the fridge to chill for at least two hours. At this point, the dough can also be frozen.
- Once ready, roll out the dough & proceed per your pie recipe’s instructions!
Tried this recipe? Make sure to rate and review and tag @sturbridgebakery on Instagram!

Best pie crust I have used to date! It’s simple yet delicious. It creates such a nice stable crust to make different pie crust designs and it is so light and flaky once you are done baking it. Definitely will use again.
Thank you so much, Karina!!! I am so glad you enjoyed 🙂
My first attempt at a pie crust, it was delicious. I had to add some extra ice water to get it to come together, but it turned out great. A little rustic looking due to my poor crimping skill, but still tasty!
Thanks so much Rylee!